


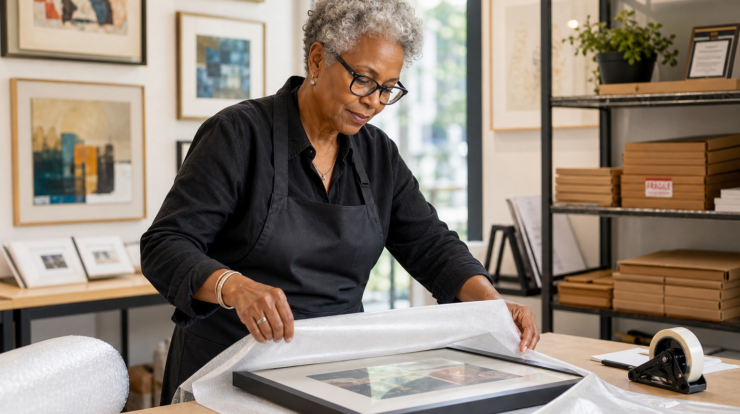
One detail that can easily be overlooked in the midst of a busy show or a thriving gallery is preparing your artwork for direct pickup. A buyer walks in, eager to take your piece home — but are you ready to hand it off confidently, so the excitement of the sale isn’t deflated by a clumsy, last-minute scramble?
From years of gallery retail experience, I’ve learned that a smooth, professional artwork handoff is more than a courtesy. It’s marketing. When collectors feel cared for, and the work leaves the show looking sharp and protected, you reinforce your reputation with every sale.
Below is the checklist we’ve honed over hundreds of transactions. Adapt it to your own setup — but don’t leave presentation to chance.
Framework: Wrapping Artwork for Immediate Pickup (No Shipping Required)
1. Stock Quality Protective Materials
- Clear plastic art bags (thick and resealable, in a few standard sizes), ideal for unframed, matted, or small framed pieces (with or without glass).
- Thin foam sheeting (roughly 1/8" thick, perforated if possible), for larger framed artwork or pieces with more delicate surfaces.
- Kraft/butcher paper (as backup, never directly against painted surfaces—use only for outer layer).
2. Have Essential Supplies Ready
- Acid-free tissue (for extra protection, especially on varnished or glass surfaces).
- Packing tape, painter’s tape (gentler for temporary use), and attractive stickers or branded labels.
- Business cards or postcards to include in each package.
3. Wrapping Sequence
- For unframed or matted prints:
- Slip artwork into a clear art bag.
- Add sturdy backing board (foam core, if possible) for structure; seal shut.
- For framed artworks with glass:
- Wipe glass clean, check corners for stability.
- Optionally, place a sheet of acid-free tissue or foam between frame and outer wrap.
- Wrap snugly in foam sheeting; neatly tape closed.
- If possible, slip the wrapped piece inside a fitted plastic art bag.
- For framed works without glass (e.g., acrylic paintings):
- Never apply plastic directly to fresh, varnished surfaces (risk of sticking).
- Chalk up a layer of foam sheeting to prevent friction; then slip into a plastic sleeve or wrap in Kraft paper for easy handling.
4. Final Touches & Branding
- Apply a sticker or branded label to the outer wrap.
- Attach a business card.
- Offer basic care instructions if relevant (small printed note, optional).
- Ensure the package is easy to carry — consider reusable tote bags for smaller pieces or attached handles on larger items.
5. Set Buyer Expectations
- As you hand over the artwork, clearly mention:
- "The artwork is protected, but please handle with care and avoid leaving it in a hot car."
- Offer help transporting it to their vehicle, especially for heavy or awkward sizes.
Practical Tips:
- Pre-wrap lower-value or quick-sale items before the show to save time during rushes.
- Show your logo on the package — walking advertisements as buyers exit.
- Use eco-friendly sleeves or recycled materials when possible, and tell your buyers.
Takeaway
A thoughtful wrapping process doesn’t just protect art; it reinforces your professionalism and sends buyers home eager to display (and talk about) what they just acquired. Ditch the scramble, plan your materials, and treat your packaging as the last step of your sales pitch.
Your Turn:
What wrapping solution or supply has been most effective (or disastrous) for you at a show? Share your best—and worst—artwork handoff stories in the comments.

I keep several types and sizes of bags on hand. Small, medium and large paper bags to which I attach a printed label with my name and website. In addition I also keep cloth bags with handles – and my name & website printed on the side.
For protecting the pieces, I also have stretch wrap, and thin foam sheeting.
If I need to ship a sculpture I build a custom wood crate, and I protect the work with generous amounts of Kaizen foam that is cut precisely to the size and shape of the artwork, to provide a protective cradle.
Great to have this issue discussed Jason.
The number of times we have purchased very expensive pieces only to have the gallery expect us to put them in our vehicle completely unwrapped, and once wrapped in a single sheet of old newspaper with dodgy sticky tape.
As a gallery owner, we take pride in our wrapping abilities and always carrying the artwork out to the car.
We make sure to have various bits of cardboard on hand as well so that clients can put this underneath the artwork in their vehicle as added assurance.
I agree with you to use a gallery sticker or similar on the outside.
We also try and use recycled wrapping if it is still neat and tidy wherever possible, and we point this out to the client.
I am curious about the “chalking up” you mentioned. Won’t that leave some kind of residue behind?
Lovely article! As a fairly new artist, I have used a number of methods but it’s nice to have something to follow. BTW I keep all of your articles as reference. Thank you for sharing your knowledge.
I use different sizes of 4 Mil Industrial Poly Bags from Uline. Once a painting is finished and dried, I’ll slip them into the sleeves to store. It works really nice.
I never do full size shows where I bring original paintings along, only the smaller ones where I can set my table of stationery up in about a half hour. However I have had good experiences ordering from papermart.com multiple times when I needed resealable clear art containers, and they have a LOT of items pertaining to this.
When my customers order stained glass panels from me that are larger than about 18″X18″ I always make a custom wooden crate suitable for shipping, even if they’re picking it up locally. Then I tell them to save it in case they ever move or it needs repairs.